
Privacy policy
PRIVACY POLICY
This site makes use of Google cookies for Analytics (see https://policies.google.com/technologies/cookies for Google’s cookie policy) and Heatmap’s cookies for monitoring purposes (see https://heatmap.me/privacy for hitmap.me’s cookie policy).
Persistent cookies are stored on the user’s device until a specific time (which can be minutes, days, or years in the future) or until deleted manually through web browser settings or specialized computer software.
Binary Emotions makes use of PayPal as payment gateway for financial transactions/donations (https://www.paypal.com/it/webapps/mpp/ua/privacy-full).
We don’t collect any personal data of yours nor send to third parties.
Raspberry Slideshow changelog
RASPBERRY SLIDESHOW
About | Download and use | Donation | Changelog | Signage Orchestrator
Version 19.0
- Raspberry Pi 5 compatible: the underlying base system has been updated to the latest Raspberry Pi OS Lite, v.12, Bookworm;
- OMX Player has been replaced by mpv.
Version 18.0
- WebDav functionality: sliding media from an ownCloud/NextCloud folder added;
- Instagram posts’ media slide [with strict Instagram limitations];
- background music (useful for images-only playback);
- code refactored and a couple of minor bugs fixed;
- site documentation revised.
Version 17.0
- Google Drive functionality added: fetching and sliding media from your Google Drive account’s folder is now possible, pairing the older Dropbox feature.
Version 16.0
- the underlying base system has been updated to the latest Raspberry Pi OS Lite, v.11, Bullseye with a backported OMX Player.
Version 15.1, maintenance release
- system has been updated to the latest Raspberry Pi OS Buster Lite (formerly known as Raspbian Lite).
Version 15.0, maintenance release
- Dropbox feature restored (it was broken since Dropbox changed their API – again);
- system has been updated to the latest Raspberry Pi OS Lite (formerly known as Raspbian Lite).
Version 14.0
- Refresh of the remote media list rewritten, now performed asynchronously by a pool of “watchdog workers”. This drastically reduces the blank between loops when the refresh feature is enabled;
- Dropbox feature restored (it was broken since Dropbox changed their API);
- Informational output on some TVs when playing videos should be now removed, thanks to Sean Monaghen;
- system has been updated to the latest Raspberry Pi OS Lite (formerly known as Raspbian Lite).
Version 13.1
- the underlying operating system has been updated. This solves an issue with the kernel on the Pi4, causing some fbi issues (many thanks to Torsten Walther);
- splash screen.
- media.conf now replaces all the .txt files for configuring the system behaviour. It’s a breaking change;
- upon timeout reached, only remote changed sources’ media are fetched again (previously, all media of all remote sources were downloaded);
- Web/P images added to whitelisted images’ file formats;
- better logging and prittier debugging output;
- refetching hashes improved and better handling of connection issues (Dropbox improved);
- USB device is unmounted as soon as media have been copied to the internal SD card for a safer USB key removal, idea thanks to Francois Audirac;
- default MEDIA_FOLDER moved to /var/lib/rs;
- the underlying operating system has been updated.
Version 12.0
- the underlying operating system has been updated to Raspbian Buster, which assures the compatibility with the new Raspberry Pi 4 and all the older boards;
- sliding Dropbox-fetched media feature has been added: you can now play images and videos directly from your Dropbox account!;
- username and password can now be set directly in the network-share.txt file for the Windows share feature (previously a trivial modification of the source files was needed);
- debug information is now much more verbose, easing issues discovery;
- improved overall playback fluidity;
- some bugs have been fixed, the most tedious one was that at every refresh timeout (serverlist-refresh.txt) all the media were downloaded, regardless if an upstream file had been modified or not;
- Raspberry Slideshow code is now a proper Debian .deb package and not just a collection of source code files hand-copied across the system.
Version 11.0
- the underlying operating system has been updated to the latest Raspbian Stretch build, which assures the new Raspberry Pi 3b+ compatibility (raspberrypi-bootloader);
- SMB v2 is now used by default for the Windows (Samba) share functionality;
- serverlist-related media fetching does not fire in case of download error.
Version 10.0
- the underlying operating system has been moved to Raspbian Stretch; the overall performance is sensibly better;
- a Systemd unit file now replaces the older SysV init-script for launching the slideshow;
- smoother transitions between images and videos;
- some minor improvements on code.
Version 9.0
- underlying Raspbian Jessie operating system updated (I tried to switch to Raspbian Stretch, but it’s still full of bugs); kernel and bootloader packages have been updated as well;
- omxplayer is now taken from Stretch (APT pinning);
- the way the operating system mounts the inserted USB keys has been changed: usbmount has been removed (because it is now deprecated for the now-stable Debian Stretch) and now Raspberry Slideshow itself is responsible for the mount;
- improvement: all txt config files (as network-share.txt & co) are now pre-processed in order to “clean” non-unix line terminators in one passage (dos2unix);
- if Raspberry Slideshow finds out a .txt.txt filename exists, which of course is an error, it renames the file as .txt;
- debug information is now also stored into a file (/var/log/rs.log);
- bugfix: EXIF rotate did not work for Samba files;
- some minor improvements on code.
Version 8.0
- underlying operating system updated; fbi program now taken from Stretch (APT pinning);
- Raspberry Pi Zero W compatibility;
- Oops: Terminated output supressed when quitting fbi;
- some minor improvements on code.
Version 7.0
- media retrieval from local network folder shares (Windows shares/Samba, for example: //192.168.0.100/myShare;
- cleaner playback;
- faster boot;
- some bugs fixed (images playback).
Version 6.0
- removed linux-wlan-ng package, which interferes with the Raspberry 3 built-in 80211 module. Reinstall in case you use a Raspberry Pi 2;
- no black screen after all images playback while possible (i.e. when no video and no server content refresh is set). Of course images to videos transition and reloading remote resources need a very quick blank;
- optional photos rotation based on their EXIF informations (enable in /etc/rs.conf).
Version 5.0
It’s a complete new operating system which combines and enhances Raspberry Picture Frame Slideshow 4.0 and Raspberry Video 1.0, now both defunct.
- Raspberry Pi 3 compatibility;
- image and video playback;
- images: no more a web-based slider, but a native Linux image slider directly using the framebuffer (speed, stability).
Raspberry Slideshow donation
RASPBERRY SLIDESHOW
About | Download and use | Donation | Changelog | Signage Orchestrator
If you like this project please donate.
As a donor, you will have full access to the unrestricted versions of: Raspberry Digital Signage (web-based digital signaging) and Raspberry Slideshow (image/video slideshow-based digital signage), which can be deployed on how many devices you wish (no serials’ checks or similar sh*t)!
Full Slideshow features:
- SSH remote management;
- no screen blanking active on system (unlimited and uninterrupted playback time).
Donation page:
Thanks to your support, Binary Emotions’ operating systems are growing year after year since 2012!
Instant WebKiosk was the first Binary Emotions’ project, a live i386 operating system created just for fun. With time, many users asked for a Raspberry Pi port; since that port came to life, user base has grown to some impressive numbers 😀
Download Raspberry Slideshow // documentation
RASPBERRY SLIDESHOW
About | Download and use | Donation | Changelog | Signage Orchestrator
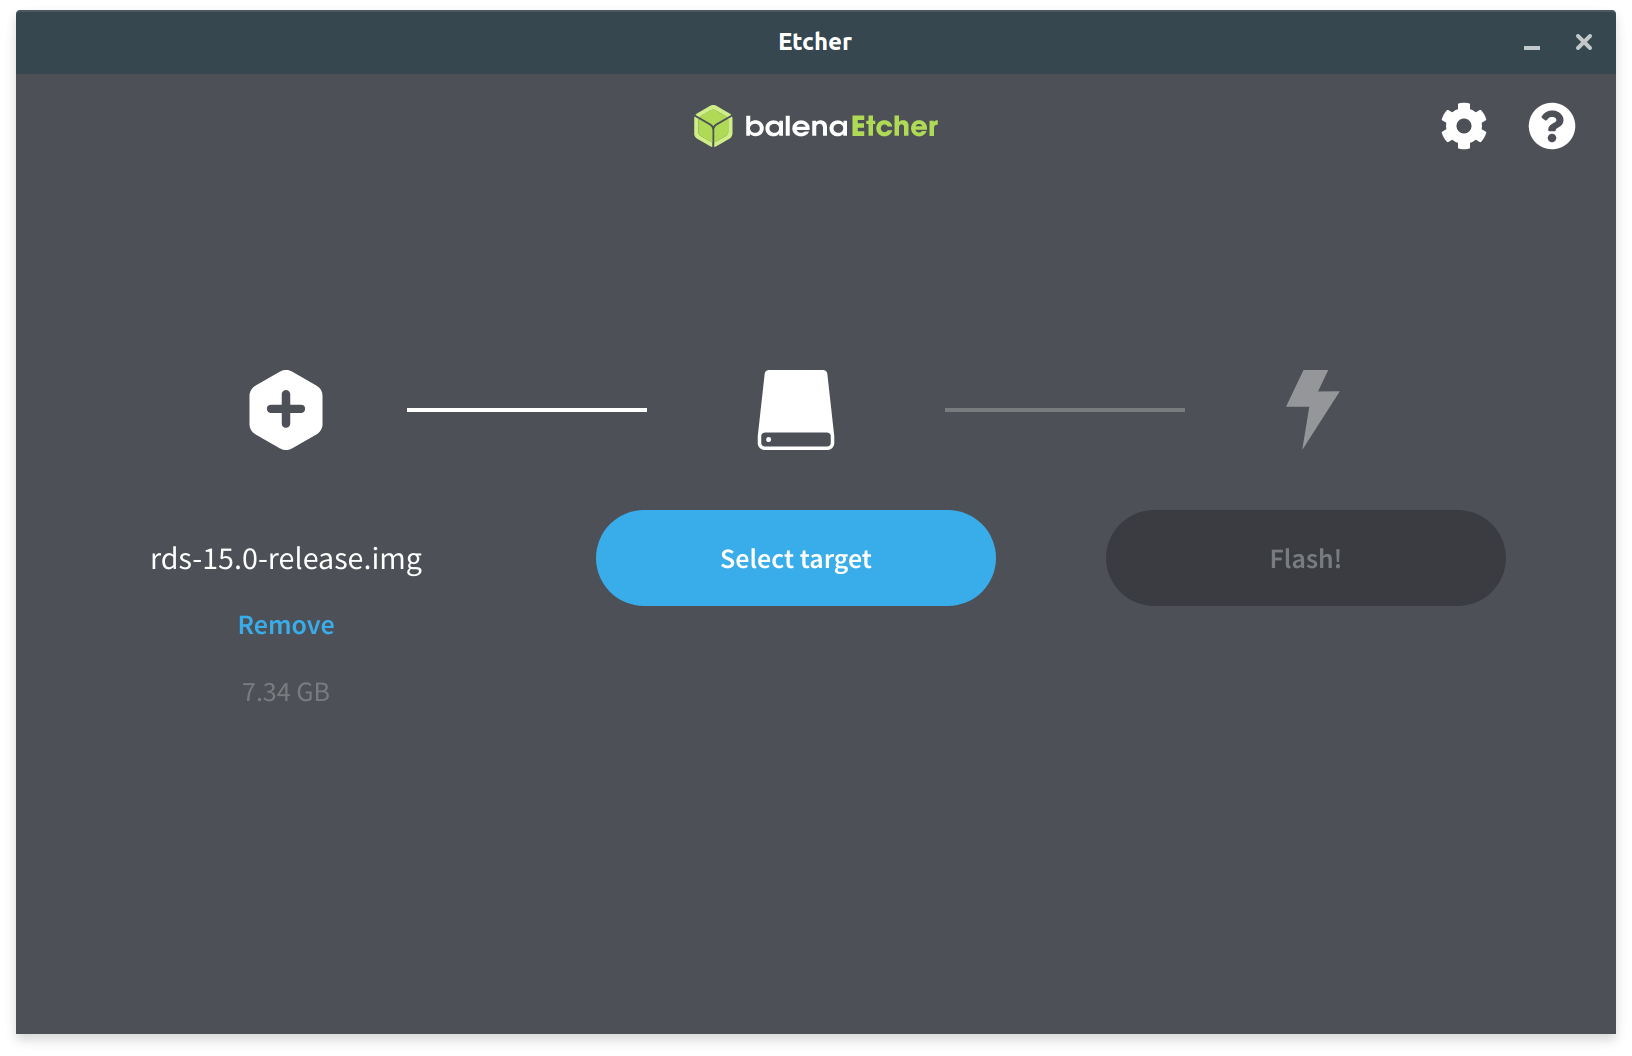
Detailed write instructions are available here (long story short: you can write Raspberry Slideshow with Balena Etcher to a micro-SD card of 8GB minimum – exactly as any other operating system for the Pi). Do not write to a USB key even if you own a Pi 4+.
Compatible with all Pis with an Ethernet port. Raspberry Slideshow 19+ builds are Raspberry Pi 5 compatible.
Some default images and videos (taken from the Web and YouTube) are included within the system for a quick functioning example: plug in the Ethernet cable (DHCP) for a full experience.
This “release” build of Raspberry Slideshow is limited is some functionality: please have a look at the donation page for the full access to the unrestricted versions of all of Binary Emotions’ operating systems.
For web-based signage, please have a look at Raspberry Digital Signage instead.
SETUP: HOW TO USE
Documentation always refers to the latest operating system version.
1. Local media
Put image and/or video files into a USB stick with one only partition (or use its first partition), vFAT/NTFS or ext4 formatted. Files must be put in the root folder (not inside directories).
Plug the USB stick into the Raspberry Pi running Raspberry Slideshow and (re)boot.
That’s all – it’s that easy.
A configuration file, media.conf, can be saved in the USB key, configuring all the system functioning modes explained in the rest of this documentation.
A sample of the file is exemplified below and can be downloaded here.
You can combine any of the media.conf directives with each others and also save media into the USB key directly.
url: https://www.binaryemotions.com/rs-default-media/verona.san-zeno.jpg
url: https://www.binaryemotions.com/rs-default-media/verona.arena.jpg
# REFRESHABLE CONTENT:
# Server-managed inventory.
serverlist: https://www.binaryemotions.com/rs-default-media/images.txt
# Samba share.
smb.share: //192.168.0.210/share/test
smb.username: admin
smb.password: test
# Dropbox.

dropbox: enable
# Google Drive.

gdrive: enable

gdrive.folder: FOLDER_NAME_WHERE_TO_SLIDE_MEDIA_FROM
# ownCloud / NextCloud

webdav.url: http://192.168.0.210/owncloud/remote.php/webdav

webdav.folder: folder

webdav.username: user

webdav.password: password
# Instagram profile media.

instagram.profile: profile

instagram.username: username

instagram.password: password
# Background music.
# Plays background-music.mp3 file, if exists in folder.
background-music: enable
# Remote media refresh.
# Values yes|no.
# If you 1) use only images and 2) do not use remote media or do not need remote media list to be re-read during the playback, please set this to no: images playback will be continuous without the blanks needed to check remote changements.
media.refresh: no
4. Fetch media from a Windows (Samba) share
5. Fetch media from your Dropbox account
6. Fetch media from your Google Drive account
7. Fetch media from a WebDav source: ownCloud/NectCloud
8. Fetch media from an Instagram profile (with limitations)
The refresh feature (use with 3., 4., 5., 6. and 7.)
Raspberry Slideshow can refresh the media list (inventory linked media, network share and Dropbox/Google Drive/WebDav content) in order to slide images and videos according to any server change.
You can accomplish this by enabling the refresh directive in the media.conf file, like:
# Remote media refresh.

media.refresh: yes
System is smart enough to actually re-download remote media only when it detects changes: addition or deletion/renaming of a file.
In order to avoid frequent full re-downloads, while adding/deleting files and updating their names is always detected as a change, a simple change in the file content cannot be seen – yes, it’s a “broken by design” limitation.
Please note. If you (1) use only images and (2) don’t use remote media or don’t need remote media list to be re-read during the playback, please set media.refresh to no: images playback will be continuous without any blank.
Automatic photos rotation
An optional photos rotation based on their EXIF informations is available; enable in /etc/rs.conf via SSH as root (see below). This will increase the boot time.
Using SSH (donors’ build only)
You can perform an SSH login with the following clients:
-
*nix users will make use of the native ssh client – open the terminal emulator and type:
ssh pi@RASPBERRY_IP. - Windows users will use Putty, MobaXTerm, any cygwin-derived program or the Linux Subsystem for Windows (preferred; in this case the syntax is identical as the *nix users’).
Use the following default credentails:
user: pi
password: live
then, once in, type: sudo -i for administrative rights (root)
If you need to modify a file, you can now use mc -e /path/to/file or nano /path/to/file.
Please change the default SSH password for your security.
Using scp and sshfs (donors’ build only)
Ruleset
The following rules apply.
- All the USB files (images, videos and media.conf) are copied into the internal Raspberry’s SD-CARD:
– if the USB key is inserted: at every reboot, SD-CARD files are updated and hence played according to the key’s content;
– if the USB key is not inserted: at every reboot, media are played from the internal cache. So, after the first run, you can unplug the USB key. - Functioning modes can be combined.
- Media will be displayed in a name-based order, and in the following sequence: remote images, then inventory-related images, network share, Dropbox, Google Drive, WebDav, Instagram and then USB-contained images, followed by videos. So, images come first and then videos. This behaviour is by design and unmodifiable, because two different players are used.
- Accepted image formats are jpeg (.jpeg or .jpg), png, gif.
- Accepted video formats are mostly mp4 files.
Background music
Save an mp3 file named background-music.mp3 into the USB stick and enable the related media.conf directive in order for a music to partner your images’ slideshow.
Debug mode (via SSH)
Debug is only possible by using SSH, no direct access to the terminal emulator is possible.
Setting DEBUG=”y” in /etc/rs.conf enables the debug mode.
System actions will then be logged in /var/log/rs.log, so you can use tail -f /var/log/rs.log or cat /var/log/rs.log.
A preferred way of debugging is however by directly launching the Raspberry Slideshow stack via SSH.
SSH in as root, stop the rs Systemd service (systemctl stop rs), enable the DEBUG mode, go to the folder where Raspberry Slideshow is installed (cd /usr/lib/rs) and launch rs.sh:
./rs.sh
System will log on-screen.
MOST ASKED QUESTIONS
Remove black borders (images’ slideshow)
Change transition time, randomize images playback
Playing media only and always from the USB key (not SD card)
Fix green screen in video playback/Videos are played only once
PLAYERS’ ORCHESTRATION
So far, this page refers to one (only) Raspberry Pi unit. A web interface is also available for the purpose to command many Slideshow units (“players”).
Signage Orchestrator is a central web interface you can use to schedule Raspberry Slideshow players to slide media in a calendar-based timetable. More information here.
Full version // screen goes blank after about 10 min // there’s no SSH support
This “release” build of Raspberry Slideshow is limited is some functionality: please have a look at the donation page for the full access to the unrestricted versions of all of Binary Emotions’ operating systems.
Donation page
DONATION
If you like my projects, please donate.
Binary Emotions Bundle
As a donor, you will have full access to the unrestricted versions of: Raspberry Digital Signage (web-based digital signage) with its plugins and Raspberry Slideshow (image/video slideshow-based digital signage), which can be deployed on how many Raspberry Pi devices you wish.
One donation. Lifetime updates, no subscription of any kind.
Also included:
Donation method
Please donate via the following PayPal button for the Bundle with perpetual updates.
Once donation is performed, PayPal will redirect you to the Download URL (from where you can download future updates as well): do not close the PayPal page before the redirect occurs.
Raspberry Digital Signage donation
RASPBERRY DIGITAL SIGNAGE
About | Download | Donation | Docs | FAQ | Changelog | Plugins | Signage Orchestrator
The “release” (demo) build of Raspberry Digital Signage is limited is some functionality: if you like this project please donate.
As a donor, you will have full access to the unrestricted versions of: Raspberry Digital Signage (web-based digital signage) and Raspberry Slideshow (image/video slideshow-based digital signage), which can be deployed on how many devices you wish!
Full Digital Signage features:
- SSH remote management;
- no screen blanking active on system (unlimited and uninterrupted display time).
Donation page:
Thanks to your support, Binary Emotions’ operating systems are growing year after year since 2012!
Raspberry Digital Signage plugins
RASPBERRY DIGITAL SIGNAGE
About | Download | Donation | Docs | FAQ | Changelog | Plugins | Signage Orchestrator
Available plugins: Web Kiosk | WordPress | MagicMirror²
You can reactivate the display of the normal Chromium address bar with the following command via SSH as root:
sed -i 's/chromium-browser --kiosk --home-page/chromium-browser --kiosk-placeholder --home-page/g' /rds/home/rds-user/.rds-xinitrc

systemctl restart rds
This restores the standard address bar to Raspberry Digital Signage and tunes it in a system suitable for usage in web kiosks and multi-user web workstations environments (cafès, offices, schools, hotels, hospitals, libraries), where people can freely surf the web.
Raspberry Digital Signage with this “plugin” replaces the older Raspberry WebKiosk.
Revert with:
sed -i 's/chromium-browser --kiosk-placeholder --home-page/chromium-browser --kiosk --home-page/g' /rds/home/rds-user/.rds-xinitrc

systemctl restart rds
Raspberry Digital Signage admin interface allows you to set up the URL of the web resource to be displayed; it can be an Internet one (https://www.binaryemotions.com), a LAN URL (http://192.168.1.100/booking; http://booking.lan), or even a resource located internally, inside the Raspberry Pi’s filesystem. You know that already.
To simplify the creation/management of an internal site setup, the wordpress plugin adds a WordPress installation to the system (/rds/var/www/wordpress).

Plugin installation
From a SSH terminal of Raspberry Digital Signage (donors’), as root:
Prerequisites
In order to view (and administer) the Pi’s WordPress site from your PC, just add the following line to your PC hosts file:
RaspberryPi_LAN_IP_in_this_moment wordpress
For example:
192.168.0.120 wordpress
This way, your PC will identify the URL http://wordpress as coming from the Pi.
Google for what “hosts” file means if unsure.
Usage
Set up your site on the internal WordPress installation: as a normal WordPress site, by browsing from your PC to http://wordpress.
WordPress admin (http://wordpress/wp-admin/) login is: admin / password.
Remember to change it. Binaryemotions won’t give basis/informations on how to use WordPress.
Make Raspberry Digital Signage display it: from the admin interface, set http://wordpress as the kiosk URL (the plugin’s installation will do it for you, but if you change it, then remember to set up this way).
Since the provided build of WordPress is of course outdated when you will install it, an advised preliminary step is to update it.
Disable network check
Upon boot, the system checks for the availability of the network, in order to display the proper admin interface if no network is available. However, with an internal WordPress installation, the network check could be undesired: in case, modify /rds/home/rds-user/.rds-xinitrc as:
Useful things to do with this WordPress installation
Many. Among the others, a plugin which is worth a try is foyer.tv.
Install it from WordPress plugins page, then create a presentation and put its link in the Raspberry Digital Signage admin interface as the kiosk URL.
Uninstallation
A MagicMirror² for Raspberry Pi plugin
MagicMirror² is an open source modular smart mirror platform. With a growing list of installable modules, the MagicMirror² allows you to convert your hallway or bathroom mirror into your personal assistant. MagicMirror² is the winner in the official Raspberry Pi magazine’s 50th issue celebration feature voted by the Raspberry Pi community.
This plugin installs in a few steps the MagicMirror² project on top of Raspberry Digital Signage. Code is built by the creator of the original MagicMirror with the incredible help of a growing community of contributors. Please consider a donation for them if you make use of it.
Quite cool actually.
Requirements
This plugin requires at least Raspberry Digital Signage v.18.
Plugin installation
From a SSH terminal of Raspberry Digital Signage (donors’), as root:
Customizing
Please see the official documentation.
Config file is located in /rds/home/rds-user/MagicMirror/. Once you modify the config file, restart the signage stack: systemctl restart rds.
Uninstallation
Raspberry Digital Signage changelog
RASPBERRY DIGITAL SIGNAGE
About | Download | Donation | Docs | FAQ | Changelog | Plugins | Signage Orchestrator
Version 20.2
Rebased (not only updated) on latest Raspberry Pi OS Lite, v.12, Bookworm, so Raspberry Pi 5 compatible.
Version 20.0
The underlying base system has been updated to the latest Raspberry Pi OS Lite, v.12, Bookworm.
Version 19.0
The underlying base system has been updated to the latest Raspberry Pi OS Lite, v.11, Bullseye with Chromium 113.
Version 18.3
Moving back to Buster (which sounds good also for a movie name): Raspberry Pi OS Bullseye 32 bit is giving some users a lot of troubles with shared libs and other binaries, as of now, so the Raspberry Digital Signage stack of v18.2 is back-ported to a Buster system. Next time, next try.
Version 18.0
- Chromium settings persistence logic more intuitive;
- the virtual keyboard extension is now disabled by default;
- underlying base system has been updated to the latest Raspberry Pi OS Lite, v.11, Bullseye. Chromium 98 and rpi-chromium-mods 20220111 packages are amongst the others.
Thanks to Stefan de Vries’ feedback, I noticed an obscure problem with X.Org not starting on Pi 3 (maybe the never ending pain in the ass regarding the rootless X run), while, curiously, on Pi 4 it has no problems. A fix has been issued with v.18.2.
Version 17.0
- Chromium settings persistence logic changed: browser is kept back to default settings or last-persisted settings only when user asks for and not upon every reboot (maybe a more balanced behavior in regard to security vs. user experience);
- settable DPI feature returns to work (the feature has been removed in the latest builds for some issues of the underlying OS);
- a new, better, virtual keyboard extension has been installed by default;
- lowercase URLs issue fixed;
- system has been updated to the latest Raspberry Pi OS Lite – this contains important security fixes. Chromium 92 and rpi-chromium-mods 20210212 packages are amongst the others.
In memory of my father Giovanni, 2021-12-13.
Version 16.0
- REST JSON API finally added. The REST API is the foundation upon which to build a central interface (or orchestration scripts as well) to command all your displays;
- compatibility mode added. Kiosk URL is usually loaded within an iframe in order to take advantage of the refresh and scheduling [to be done] features. However, some resources refuse to run within browser iframes (even setting the browser to ignore the X-Frame-Options HTTP response header).
In this case, with the Compatibility mode resource will be loaded as a ‘normal’ page, but of course the aforementioned features won’t work.
Version 15.0
- frontend rewritten and improved (legacy technologies for speed, modern best practices);
- the browser now loads the digital signage URL dynamically as the configuration file changes – and not upon start only; this is the base for managing many Pis from a central interface, which is a (future) use case many users ask for;
- Chromium now makes full use of the GPU – HTML5 videos and modern CSS effects play a lot better (thanks to Ciprian Rusu’s and Diego Vega’s feedbacks);
- Wi-Fi 802.11 networking fixed (networks’ display);
- system has been updated to the latest Raspberry Pi OS Lite (formerly known as Raspbian Lite), with Chromium 88.

Version 14.0
- Screen rotation management completely modified, now it’s up to X.Org, for /boot/config.txt options are getting useless. This was the real big issue of the past build. Thanks to Shawn Gants for the hints;
- audio fixed, thanks to Michal Maruška and Paul Thurn. Oh yes, this too was annoying;
- mouse-pointer-always-disabled setting returns to work (useful for touchscreens). The Matchbox window manager flag seems not to be supported any more, so now Raspberry Digital Signage is using the proper flag when launching X.Org via xinit;
- Chrome auto-starts videos by default (newer Chromium builds refuse to autostart HTML5 videos on page load, otherwise);
- enabled ping for monitoring, thanks to Daniel Miranda for the feedback;
- better open networks handling added;
- system has been updated to the latest Raspberry Pi OS Lite (formerly known as Raspbian Lite), with Chromium 86 and rpi-chromium-mods 20201213 packages amongst the others.
Version 13.2
- DPI settable. This is of course useful for HiDPI screens;
- Chromium issue fix.
Version 13.1
- Plugins-ready;
- New Address Bar removed (because…) tabtiles fixed (and so used as an address bar, too);
- a couple of other fixes;
- operating system updated.
Version 13.0
- PHP/Bash backend completely rewritten and vastly improved – please see docs;
- security much much (much) enhanced;
- the Raspberry Digital Signage stack is now a standard Debian package;
- the default virtual keyboard has moved from the very basic one embedded in the window manager to a Chromium extension (Virtual keyboard – nomen omen..);
- Chrome extensions added by default to the system (Scrollbar Customizer, tabtiles, URL Slideshow);
- the New Address Bar Chrome extension is used for miming a web-kiosk-oriented system;
- user interface refactored;
- boot spash;
- many fixes (amongst them: token/mac address);
- underlying operating system updated to the most recent Raspbian Buster Lite. Chromium browser version is now v.78;
- documentation finally created 😉
- internal WordPress installation has been removed – will be packaged separately as a standard Debian .deb package.
Version 12.1
- a Raspberry Pi 4 compatible build, rebuilt with a Raspbian Buster operating system as its foundation. Some bugs have been fixed as well.
Version 11.2
- the underlying operating system has been updated to the latest Raspbian Stretch build, which assures the new Raspberry Pi 3b+ compatibility (raspberrypi-bootloader);
- Chromium browser (the most important package for this browser-face operating system) has been updated to release 60 (armhf) and rpi-chromium-mods to version 20180409 (armhf);
- a Systemd unit file now replaces the older SysV init-script for launching the digital signage stack (some code modified to comply with this new logic);
- MAC address at URL’s end feature fixed;
- Internal WordPress site viewability fixed.
Version 10.0
- the underlying operating system has been moved to Raspbian Stretch; the overall performance is sensibly better and HTML5 videos play a lot smoother;
- some improvements on code and bug fixes (the most important ones concern WiFi networks’ discovery and local WordPress virtual host, which remains disabled if unused).
Version 9.0
- underlying operating system updated: raspberrypi-bootloader, apache, php, openssl and xorg packages have been updated, among many others;
- Chromium browser is now at v.56, bundled with system’s new SSL certificates – needed after the infamous SHA1 collision event for browser’s correct behaviour with “https” sites;
- Raspberry Pi Zero W compatibility;
- digital signage page can be retrieved from the Internet, LAN or even from localhost (a www folder inside the Raspberry Pi’s SD card). To simplify the management of the internal site setup, RDS 9.0 comes with WordPress already installed (see FAQ for more);
- a little more polished UI (official 7″ R-Pi touchscreen view is painless now);
- more robust prevent-cache technique for Chromium when reloading-web-page hack is enabled (thanks to Marc Giavarra);
- some minor improvements on code.
Version 8.0
- finally, Adobe Flash Player is available for the Raspberry Pi Chromium browser! OK, it’s not the latest and greatest technology in the bunch, but many users ask for;
- operating system updated for Raspberry Pi 2B v1.2 compatibility;
- Ignore X-Frame headers Chromium extension installed, so now it is possible to display Google URLs within frames;
- some bug fixes and improvements.
Version 7.2
- Chrome 51 which features H264 and AVC video acceleration and gains ARM6 (Raspberry Pi 1 and Zero) compatibility!
- F1 key added to blacklisted keys list in the kiosk view.
Version 7.1
Older Raspberry Digital Signage infrastructure has been ported to the new Raspbian Jessie and now it is compatible with the Raspberry Pi 3 boards. So the system has been built from scratch since v1.0.
Write instructions
WRITE INSTRUCTIONS
How to write the operating system’s .img file to a micro-SD card (8GB minimum), suitable for booting a Raspberry Pi microcomputer. A good SDHC class 10 card is highly recommended.
1. Extract the .img file from the downloaded ZIP archive.
2. Write the image by the use of Etcher. Make use of a micro-SD to USB key adapter for the write process.
Raspberry Digital Signage on the Pi 4 can also boot from a USB key, so the previous steps can be performed against a USB key instead of a micro-SD card.
Linux operating system specific
Linux users can also make use of dd.
Run all the following commands as root or with sudo in a terminal emulator:
- plug the SD card/USB key into your PC;
- use
fdisk -lfor locating the device file, for example: /dev/sdx (change for your case); - it’s better to unmount the auto-mounted device’s partitions, if any (
umount /dev/sdx1,umount /dev/sdx2, …); - finally write the image:
dd if=path/to/imageFile.img of=/dev/sdx bs=50M - please note that the dd command must refer to the whole disk: do not use /dev/sdx1 but /dev/sdx, as an example.
First boot
Once you have successfully written the IMG file to the micro-SD/USB key, plug the device into the R-Pi and reboot the microcomputer. When booting from a USB key (Pi 4 only), remove the SD card before.
Notes
- See a coloured square/lighting bolt near the top right corner of the screen? Please have a look at the FAQ.
- Louis DeRobertis reports that some HDMI to VGA converters do not give enough power to the screen – it will remain blank.
- Never halt or reboot the Pi by powering it off (some Raspberry Pi boards are reported to be prone to filesystem corruption); use SSH instead (with the
haltorrebootcommands).You can of course schedule a cronjob which will turn off or reboot the Pi gracefully as well.
Download Raspberry Digital Signage
RASPBERRY DIGITAL SIGNAGE
About | Download | Donation | Docs | FAQ | Changelog | Plugins | Signage Orchestrator
Detailed write instructions are available here.
Long story short: you can write Raspberry Digital Signage with Balena Etcher to a micro-SD card or USB key (USB key for Pi 4 only), both of 8GB minimum – exactly as any other operating system for the Pi.
Compatible with all Pis. Raspberry Pi 5 compatible since v.20.2.
Full version
This “release” build of Raspberry Digital Signage is limited in functionality: if you like this project please donate.
I need to slide media files, not to display a website
For image and video files slideshow, please have a look at Raspberry Slideshow.
Docs / I have issues/questions
Just have a look at the documentation and the FAQ page.